Monday, March 30, 2015

Coconut Cake

We had a beagle mix mutt named Jethro who would go cuckoo for coconut. We accidentally found out one day when my Dad blew candles out off of his birthday cake and coconut went flying. I never saw that dog go so berserk over food before and it was a sight that I will never forget. I dedicate this post to my dear old boy that passed at 14 years of age many years ago. RIP Jethro!

Our Easter dinner would not be complete without a Coconut Cake. I just love coconut but I love toasted coconut even more. This is a big 3 layer cake that everyone will rave about. Matter of fact the original name for this recipe is Incredible Coconut Cake. I know this baby takes a little more effort than most but it is so worth it. You can always bake it 1 or 2 days in advance of your Feasty. So search no more for a perfect coconut cake recipe because it is right here.

CAKE
  • 5 eggs, separated
  • 2 cups sugar
  • 1/2 cup unsalted butter, softened
  • 1/2 cup canola oil
  • 1 tsp. coconut extract
  • 1/2 tsp. vanilla extract
  • 2 1/4 cups cake flour
  • 1 tsp. baking powder
  • 1/2 tsp. baking soda
  • 1/4 tsp. salt
  • 1 cup buttermilk
  • 2 cups flaked coconut
  • 1/4 tsp. cream of tarter

FROSTING
  • 2 pkg. of 1/3 less fat cream cheese, softened (only using a total of 10 oz.)
  • 2/3 cup unsalted butter, softened
  • 4 1/3 cup confectioners sugar
  • 1 1/4 tsp coconut extract
  • 2 cups coconut, toasted

Place egg whites in a large bowl; let sit at room temp for 30 minutes.

Preheat oven to 325 degrees. In another large bowl, beat sugar, butter and oil until well blended. Add egg yolks one at a time, beating well after each addition. Beat in extracts.

Combine flour, baking powder, baking soda, and salt; add to creamed mixture alternately with buttermilk, beating well after each addition. Stir in coconut.

Add cream of tarter to egg whites; with clean beaters, beat on medium speed until stiff peaks form.. Fold 1/4 of the egg whites into the batter, then fold in remaining whites.

Transfer to three greased and floured 9 inch round cake pans. Bake 25-30 minutes or until a cake tester inserted into center comes out clean. Cool 10 minutes before removing from pan to wire racks to cool completely.

Meanwhile; while the cake is baking I like to toast my coconut in a 12 inch non stick skillet stirring constantly until golden brown, then set side in a bowl to cool.

For frosting; in a small bowl, beat cream cheese and butter until fluffy. Add confectioners sugar and extract; beat until smooth.

Place one cake layer on plate; spread with 1/2 cup frosting and sprinkle with 1/3 cup toasted coconut. Repeat. Top remaining cake layer. Spread remaining frosting over top and sides of cake; sprinkle with remaining coconut on top and sides. Refrigerate for 2 hours for cutting or make a day or two in advance. Store in covered in refrigerator. Yield: 16 servings


This recipe is compliments of Taste of Home magazine that was submitted by Lynne Bassler and this is my version. Thank you Lynn for this incredible Coconut Cake recipe.

Wednesday, March 25, 2015

Breakfast Sandwich

Have you ever tried those frozen low fat higher fiber microwavable breakfast sandwiches that are in the freezer section? If you have not done so I recommend that you do not bother. My little tasty treasure will blow theirs away and make your taste buds sing with delight. Another bonus is that mine is also low fat and has fiber as well. Not only that it is quick and easy to make. I call that double goodness and we could all use some of that. My recipe calls for one sandwich but make as many as you want. So this is the best reason not to skip the most important meal of your day. Enjoy!

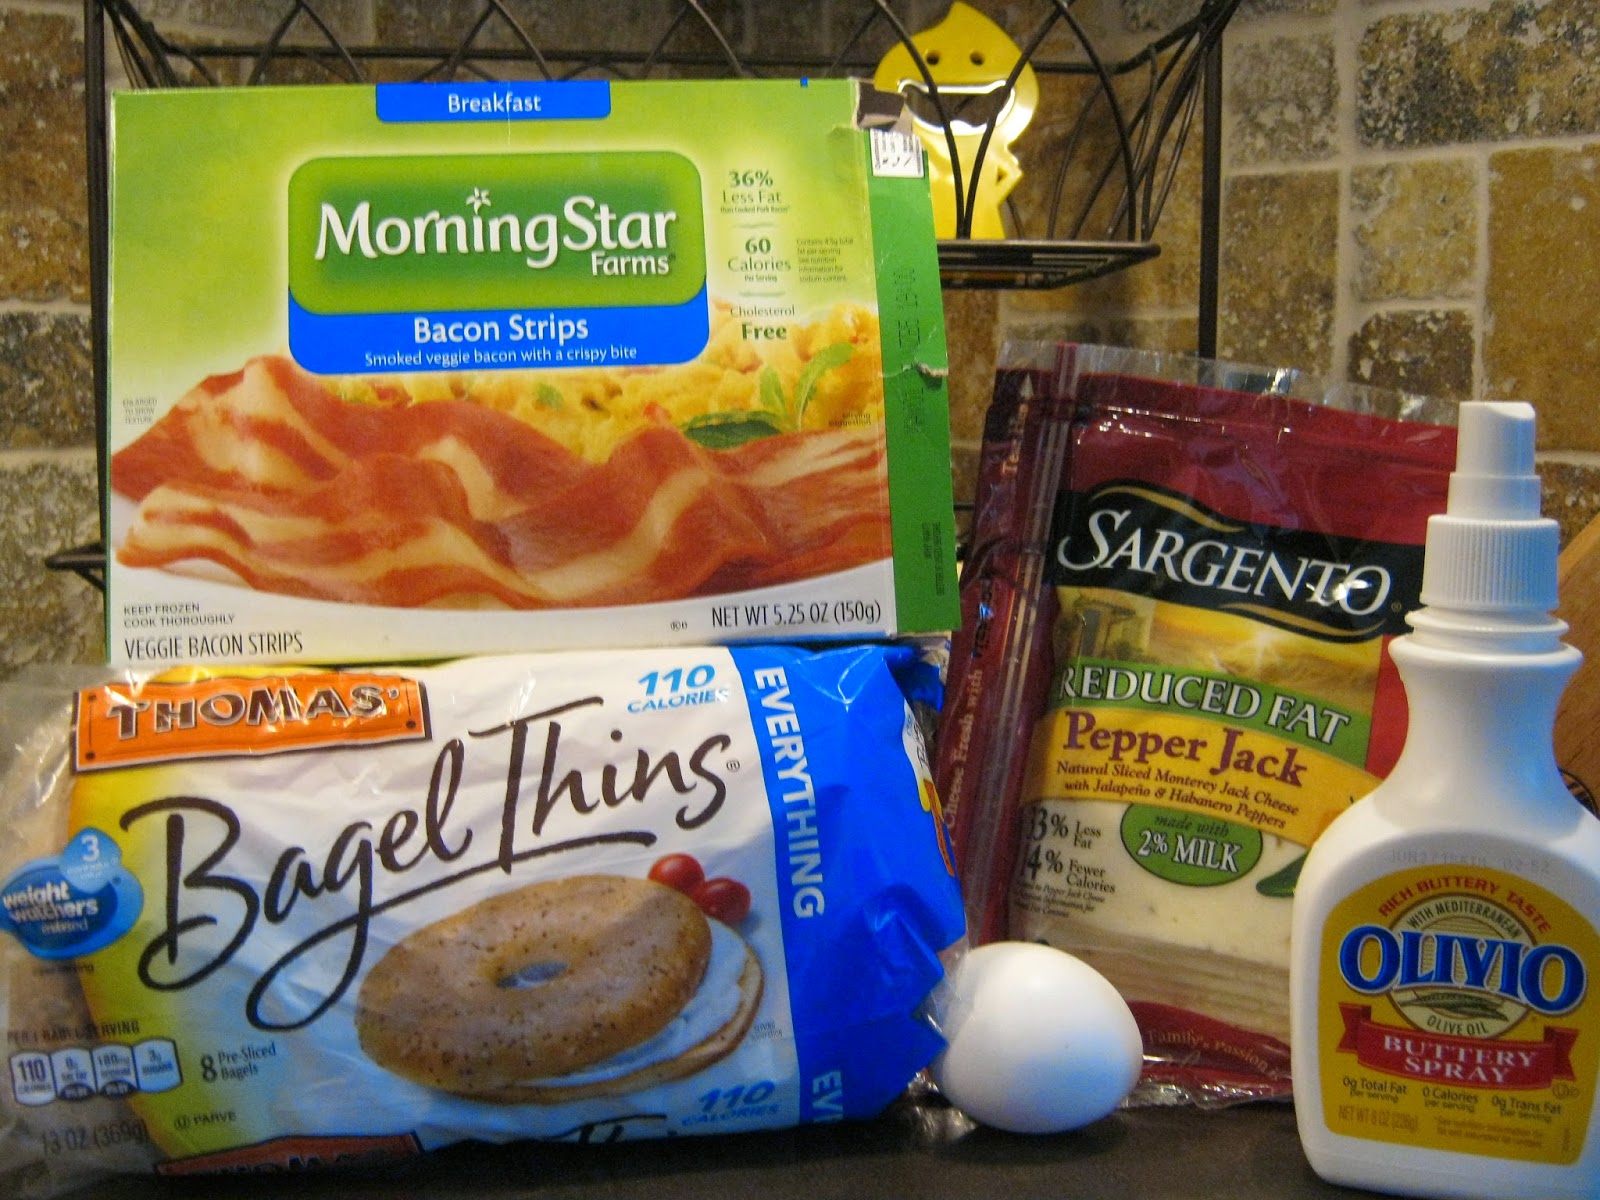
  • 1 egg
  • 1 Thomas Bagel Thins, Everything flavor
  • Morning Star Farms soy bacon strips, 2 strips
  • Sargento Reduced Fat Pepper Cheese slices, 1 slice
  • Olivio buttery spray
  • Cooking spray

Heat a nonstick skillet over medium heat, then spray with cooking spray and crack a egg into the skillet. Meanwhile place bagel into toaster keeping in mind that it is thin and toasts much faster than a regular bagel, but do not toast yet.

Now after egg has cooked for about a minute start to toast the bagel. Place two strips of soy bacon on a microwavable safe plate and place into microwave. Cook egg for one more minute then flip over and gently break the yolk (so that it may cook all the way through), and add one slice of cheese on top of egg to melt.

Next start to microwave the soy bacon for about 65 seconds or until crispy. Every microwave is different so cooking time may vary. When bagel is toasted remove from toaster and spritz the buttery spray on the inside of both bagel surfaces. Remove cooked bacon from microwave and with a flat knife loosen bacon from plate as it has a tendency to try to stick to the plate.

Add egg with melted cheese onto bagel bottom, break the bacon slices in half to fit onto sandwich and place on top of the egg. Place top of bagel on sandwich and eat right away or snag this tasty baby and squeak out the door with it..

Wednesday, March 4, 2015

Guacamole

Guacamole is one of my all time favorites! I just love this creamy dip and there are many variations to it. Chunky vs smooth, tomato or not, I could go on and on. I will share my favorite version with my Feasty Fans. So serve this as an appetizer or you could do like my Stud Muffin and I did. We had ours for lunch, yes that's right it was our lunch. Busted! We could not bare to not eat it once it was made. So poof!  We made all gone. Our tummies were full and we were fat & happy.

  • 3 ripe avocados
  • juice of 1 fresh lime, room temp
  • 1 Roma tomato, finely diced
  • 1/2 tsp. granulated garlic powder
  • 1/8 cup sweet onion, finely diced
  • a sprig or two of fresh cilantro, finely minced (optional)

You need a nice ripe avocado that is just soft to the touch and the outer skin is dark.
I like to cut the avocado in half and remove seeds. Just embed the knife blade into the seed enough so that you will be able to twist the embedded knife and the seed will pop  right out.                                                                     
Next  I like to cut the avocado meat while still in skin with a paring knife into a criss cross pattern, being careful not to slice through the skin, then scoop out with a large spoon into the bowl.
After you have prepared all 3 avocados add the lime juice and the garlic powder. It's important that the lime is room temp because it is easier to juice it that way. Cut lime in half and stick a fork in it, hold lime with one hand and twist the fork into the lime to release the juice into the bowl. The same thing works well for lemons except I place a small wire mesh strainer over the bowl to catch the seeds.                         
Mash the avocado well with a fork until fairly smooth, I like mine a little chunky but still smooth. If you want really smooth Guac then you can puree it in a food processor. Now add the onion, cilantro and tomato, mix well. Place in an air tight container but place plastic wrap over top of Guac and gently press down where ever air would touch the Guac, now seal on lid and chill. This will prevent it from turning brown on top. Serve after a few hours or so and serve with tortilla chips. Or you may be partners in crime with us and eat it right away. My hubby is a party pooper and would not let me add any Cilantro. So much for Freedom of the cook!

Tuesday, February 17, 2015

Italian Pepper & Egg Sandwich

I'll tell you that this sandwich brings back childhood memories. It's amazing how something so simple can taste so good. It's frugal and I also need to mention the quick and easy factor as well. My Mom always used green pepper but any color sweet bell pepper of your choice will do, pick your favorite or do a blend. Did you know that peppers are high in vitamin C and we all know we need that.

The only thing that I can not mimic here is the scrumptious Italian rolls that we used to get in Philly. They were delicious and made the best Hoagies ever, but here in Maryland they call them Submarines or Subs. I think everyone knows that Philly is famous for their Steak & Cheese Hoagies. My Dad swears during the war when he was a kid that they used horse meat instead of beef. If you came from Philly you will cringe here when eating one for the first time.....they put mayonnaise on it, yes that is what I said....mayonnaise. Every person in Philly knows you have to have fried onions, white cheese, hot peppers (optional but highly recommend), and ketchup on your Steak & Cheese Hoagie. That's it!  I may have talked myself into eating red meat again. I hope you enjoyed my blast from the past.

  • 3/4 cup egg Beaters or 3 large eggs, beaten
  • 1/3 cup diced green bell pepper
  • 1/4 tsp. granulated garlic powder
  • freshly ground black pepper and sea salt to taste
  • About 1 or 2 Tbsp. of freshly grated Parmigiano Reggiano
  • 2 slices of Sargento Red Fat Provolone cheese slices
  • Olive oil in spray can
  • 1 Italian long roll, partially cut through long ways, I used a whole wheat one
Use 12 inch non stick skillet over medium heat and spray bottom of pan with oil. Saute pepper for about 3 minutes. Meanwhile whisk together egg, Parmigiano Reggiano, garlic powder, salt and pepper.

After the 3 minutes have passed spray pan once more with olive oil and add the prepared egg mixture. Scramble eggs until just set then form eggs into the shape of the roll, top with provolone and split roll, turn off heat. You may add a lid at this point if you want your roll heated through more or if you don't want your roll steamed do not out lid on. Place into roll as soon as provolone is melted. Enjoy!


I made this recipe for one serving but just think how easy it would be to double or triple it.

Saturday, February 7, 2015

Creamy Penne with Chicken and Sun Dried Tomatoes

Pasta, garlic, basil, what's not to love here? Get your creamy pasta fix here while cutting back on the fat and adding some fiber. I just love it when you can trick your fat cells into singing with delight. This is a dish for a crowd so cut the recipe into half if you don't want a large amount. Or you may make a big batch and have leftovers. Guess what, it even tastes better the next day once the flavors have melded. Mangia! Mangia!


  • ¾ cup *sun dried tomatoes packed in oil, cut into thin strips with kitchen scissors,
  •  Set aside about 2 Tbsp oil from tomatoes for cooking chicken in
  • 2 lbs. chicken breast tenders
  • 2 boxes of Ronzoni Smart Taste penne pasta, but only using 1 full box and 1/2 of the second box, 16 oz. total
  • 1 whole bulb of garlic, separate cloves, peel and press into garlic press
  • fresh Basil, 3/4 cup cut thin with kitchen scissors
  • 2 cups 2% milk
  • 1 pkg., 8 oz. reduced fat Sargento 4 cheese Italian
  • ¼ to ½ tsp. crushed red pepper
  • Paprika
  • Salt
  • set aside 1 cup of pasta water before draining pasta
  • Asiago cheese, grated


In a large pot bring salted water to boil for pasta. Meanwhile in a 12 inch nonstick skillet cook chicken tenderloins in oil from sun dried tomatoes on a medium heat lightly coating both sides of chicken with paprika and salt. You will need to cook this in two separate batches only cooking 1 lb at a time.

Now that chicken is cooking as soon as the water comes to a boil add the pasta and stir well. Once it comes to a boil again, cook it for 15 minutes. This is longer than the directions recommend but trust me it works well for this recipe. This is a perfect time to prepare the sun dried tomatoes, garlic and basil while you cook the pasta and chicken.

Remove cooked chicken from heat and place chicken on platter (make sure it is not pink inside and it's fully cooked), then set aside.

Drain pasta when cooked, but make sure you scoop out 1 cup of the water and set it aside before draining pasta.

Once chicken has been cooked you need to add the minced garlic to the skillet. Saute garlic in oil and pan juices for about 3 minutes, adding basil, crushed red pepper, and sun dried tomatoes for the last minute. Add the 1 cup of pasta water that you saved to the skillet and deglaze pan by using a soft spatula gently scraping bits from bottom of the skillet to release the flavors from the pan. Turn off heat and set aside.

In a large saucepan add the milk and cheese and heat over medium heat stirring until cheese is melted. Once sauce is heated and smooth add the deglazed skillet mixture to saucepan. Simmer sauce for 5 min stirring occasionally.

In a very large bowl add pasta and sauce then toss it together well, add chicken and mix well. Serve immediately with grated Asiago Cheese.

*Sun dried tomatoes are very expensive in the grocery store, but I buy them in bulk at the wholesale
food clubs for a big savings.

Prep tips;
I like to separate garlic cloves and press down on each one with a flat metal sandwich spreader until you hear a pop, then the skin will peel right off. Also I recommend that you treat yourself to a garlic press, don't buy a cheap one because they never last long.

Separate basil leaves and stack them on top of one another holding between your fingers, then cut into thin strips with kitchen scissors. I also cut the sun dried tomatoes into strips with scissors as well.


Tuesday, February 3, 2015

White Chili

How many recipes are there for Chili? There seems to be a never ending supply of variations on this
great hearty meal. So how about some White Chicken Chili for a change? I must say that it is different, but it's really yummy. So don't be a scaredy cat to try something different. It's not too spicy but it's seasoned well and the garnishes on this one really enhance the flavors. Get your chili fix on the White Chili way and warm up you chilly bones from the inside out. This is a lean soup too in case you are watching your waistline, but it's so good you'll want to try it even if you're not.


  • 2 cups leftover chicken cut into bite sized pieces, I prefer white meat or a mix
  • 2 cups finely chopped sweet onion
  • 2 garlic cloves peeled and finely chopped
  • 2 tsp. ground cumin
  • ½ tsp. dried oregano
  • 2 4.5 oz cans chopped green chiles
  • 2 15.5 oz cans cannellini beans (white kidney beans), drained & rinsed
  • 2 cups chicken broth or 2 cups hot water with 2 tsp chicken base mixed well
  • ½ tsp hot sauce, you pick your favorite
  • 1 bag Utz Baked Tortillas
  • Garnishes; low fat shredded cheese, fresh chopped cilantro, & chopped spring onions.

I like to crush some low fat baked tortillas in there first and add the garnishes. It gives it a nice corn taste without the added fat of regular chips.

Add first 9 ingredients and bring to a boil, then simmer covered over a low heat for 45 minutes. Ta da!!! Now it does not get any easier than that. Now prep your garnishes just before serving, no sooner no later (just kidding). Ladle chili into bowl and place some crushed chips on top, then add the garnishes. Now it's chow time!

This is not a large batch of chili so it's perfect if you don't want a lot made. Double it up if you want more.


Wednesday, January 21, 2015

Banana Oatmeal Bread

I'll tell you a secret, I do not like bananas. But if you put them in a bread, pie, cake or muffin you will have my fat cells perky and my full attention. My Dad always likes to spread his with cream cheese or butter but I prefer mine naked. I can't tell you how many times I've made this bread and it's a favorite in my house. My grandson James loves his Nonna's nanner bread. Our little guy is so handsome and he's a genius too. Nonna knows.

This is a great tasting recipe that is healthier than most, less sugar, flour and it also has oatmeal in it. I just love it when that happens. Get rid of those rotten bananas with dignity!

  • 1 ½ cups all-purpose flour
  • 2/3 cup sugar
  • 1 ½ tsp. baking powder
  • ¼ tsp. salt
  • ¾ cups oatmeal
  • 3 overly ripe bananas, peeled & mashed
  • 1/3 cup fat free buttermilk
  • ¼ cup canola oil
  • 1 tsp. vanilla extract
  • 2 large eggs, beaten

Preheat oven to 350 degrees. In a very large bowl mix together all of the dry ingredients until well blended.

Combine mashed banana with the next 4 remaining ingredients, stir into the flour mixture until just mixed.

Spray a 8x4 inch loaf pan with cooking spray. Add batter to pan and cook for 55 minutes or until cake tester comes out clean. Cool on wire rack for 15 minutes then invert on rack to cool. Wrap well and refrigerate until ready to eat.


This recipe is from the 2005 Cooking Light cookbook.