Saturday, October 24, 2015

Mini Pumpkin Pies~~~16 count

Who would ever think that a martini glass and pumpkin pie would have anything in common. Well I have a tale to tell. It all started with seeing little pumpkin tarts in the grocery store. I confess that I almost bought them, sins of all sins. I must say that common sense prevailed and I knew in my heart that I could make them and not only that but mine would taste better and be fresher. It baffles my mind how long these store baked good expiration dates go on and on, it's just not natural. So back to my tale. I did not have a circular cookie cutter so I scrounged up my Stud Muffin's martini glass to do the circular cuts. It was perfect! I did purchase Pillsbury refrigerated pie crusts to help make this recipe quick and easy. By all means if you have the time please make your crust from scratch, don't let me stop you from that.
  • 1 package Pillsbury refrigerated pie crust, 14.5 oz.
  • 1 can, 15 oz pure pumpkin
  • 1 can, 12 oz evaporated milk
  • 3/4 cup sugar
  • 2 large eggs, beaten
  • 1/2 tsp salt
  • 1 tsp ground cinnamon
  • 1/2 tsp ground ginger
  • 1/4 tsp ground cloves
Remove pie crust from refrigerator and set out at room temp for 15 minutes. Meanwhile in a medium size bowl whisk together; sugar, salt, cinnamon, ginger, & cloves, now set it aside. In a large bowl whisk together; pumpkin, evaporated milk, & eggs, set aside.

Preheat the oven to 425 degrees. Now it's time to roll out the pie crust onto a floured surface and you will need to roll it out into a 15 inch circle so that the crust is not too thick. You should be able to cut out 8 circles from each crust with your martini glass (my glass was 4 1/2 inches wide at the top). If you can not get enough out of your pie crusts you will need to press scraps together and roll it again, if you need to do this you either did not roll it out thin enough or you did not place the circle cuts close enough together. Make sure that there is plenty of flour on the back of the circle of crust so that it will not stick to the muffin pan.

My Martini dough crust cutter, thanks Stud Muffin!
Perfection!

After rolling and cutting out crust center the crust over the top of the muffin pan and gently press down with a small juice glass.


To the large bowl add the dry mixture from the medium bowl and whisk together well. Pour slightly less than 1/3 cup of the pumpkin mixture into each mini pie crust. Being careful not to spill on the edges so the crust will not stick later. Place in oven for and bake for 15 minutes, then lower heat to 350 degrees and bake for 30 minutes longer or until knife in center comes out clean.


Now cool these babies on a wire rack for 15 minutes. If any filling has seeped over the edge of the pie it will make the crust stick, if that happened gently run a thin knife around edges to break pie loose. After removing pies let cool for another 30 minutes on wire rack before you cover and refrigerate them to cool. Chill for several hours or overnight to let flavors meld. I like to serve mine with a little fat free Reddi Whip.


Friday, October 9, 2015

Burritos~~~ Made Healthier

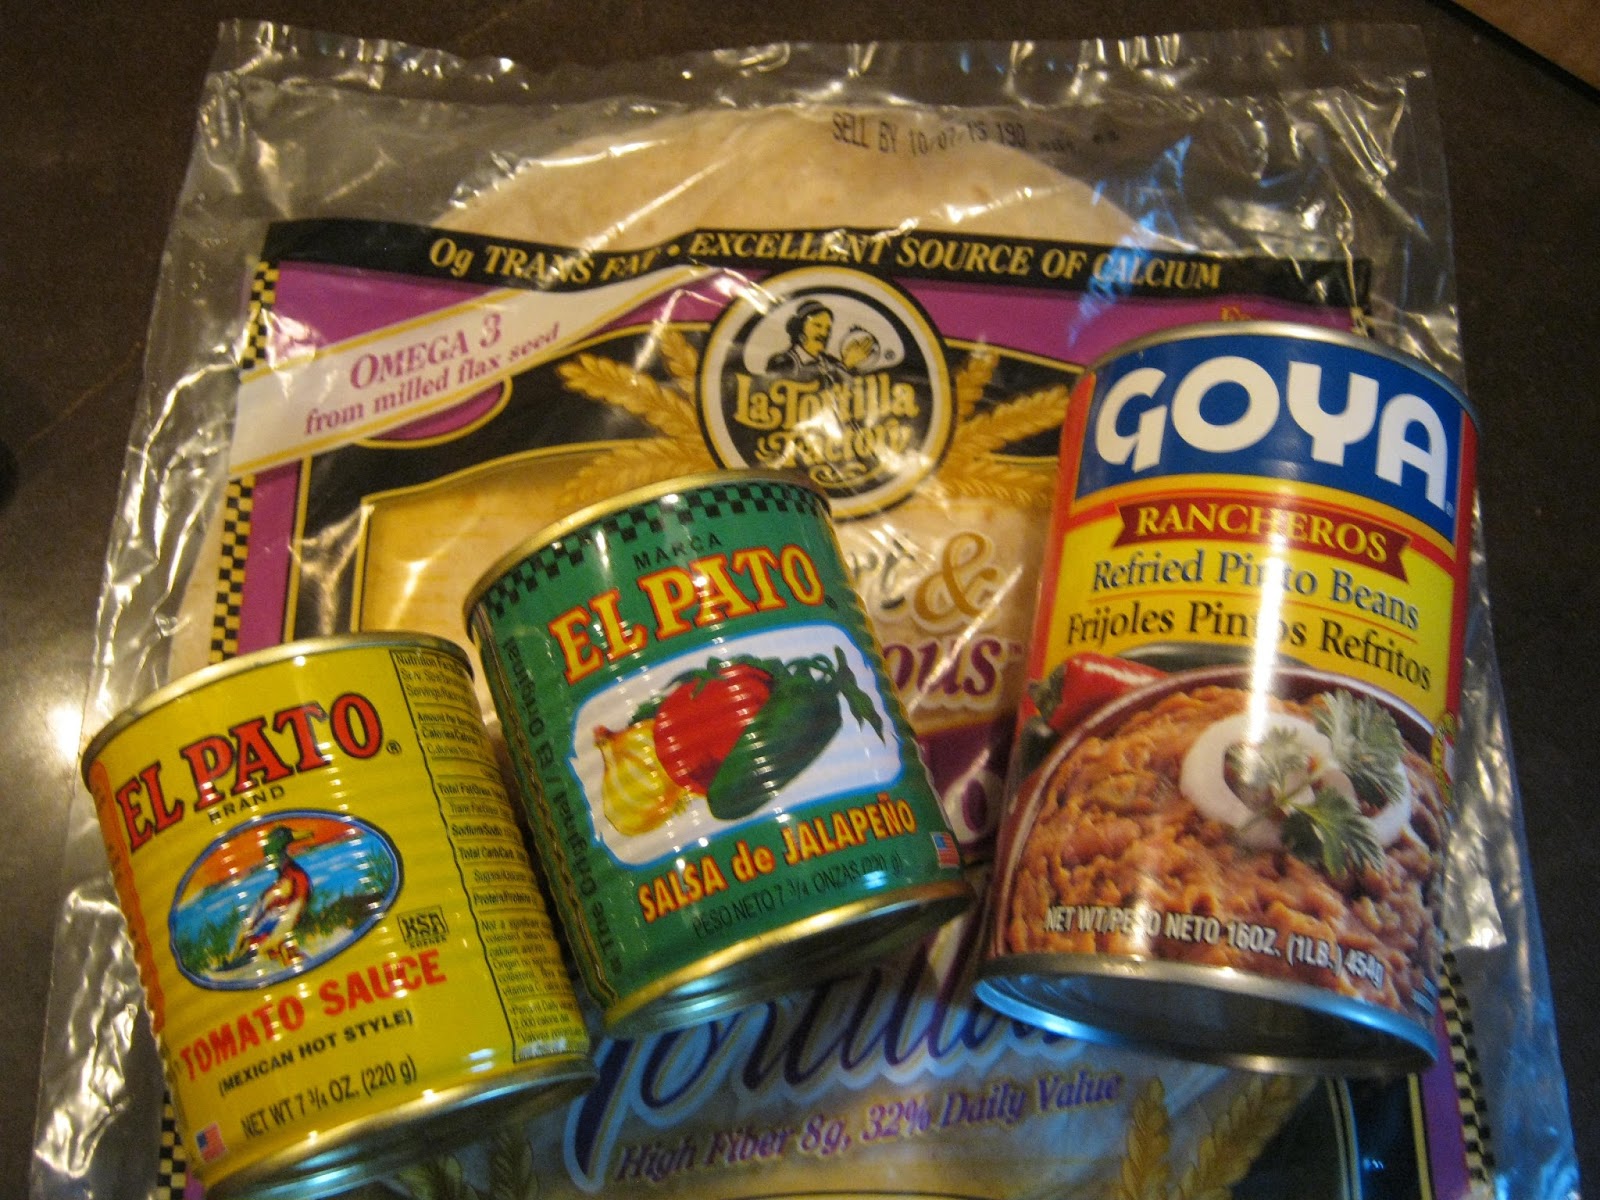
I just love ethnic foods! My love affair with Burritos spurred me to make this dish healthier. I managed to cut back on the fat and also add fiber without compromising the flavor. Another bonus to this recipe is that it only uses 7 ingredients. The products that I mention for you to use you can find in a grocery store with an extensive ethnic section. This will make 8 nice size burritos. I'll tell you that one of these babies stuffed me.


  • about 1 lb of ground turkey 99% lean
  • 1 medium size sweet onion, finely diced
  • 1 can El Pato tomato sauce
  • 1 can El Pato Salsa de Jalapeno
  • 1 can Goya Rancheros, refried pinto beans
  • 1 pkg La Tortilla Factory tortillas, 8 ct.
  • Reduced fat, grated Mexican cheese blend


Preheat the oven to 450 degrees, meanwhile preheat a large nonstick pan over medium heat sprayed with cooking spray. Now add the ground turkey and diced onion to skillet, stir meat well while it cooks until meat is no longer pink. In a 2 cup measuring open Both El Pato canned sauces and mix them together well. Add 1/4 cup of the sauce to the meat mixture along with the Ranchero beans (reserving the rest of the sauce later on for the top of the burritos). Stir mixture well until all is blended in evenly.


La Tortilla factory tortillas are the bomb.They are only 100 calories, 1.5 g fat, and they have 8 g of fiber.


Add 1/2 cup of meat bean mixture to all 8 tortillas and roll them up as shown. Fold in the sides, then the top and roll in the bottom.


I managed to squeeze all 8 of mine into my baking dish. Next you need to top them with remaining sauce and a handful of cheese on top of each one. Now bake those babies in the oven for 10 minutes at 450 degrees.


                                                                                                                                                     ENJOY!


Sunday, September 27, 2015

Pizza from the Weber Kettle Pizza Kit

I must admit that I do have a love affair with Pizza. It has been a favorite if mine as long as I can remember. As a teenager I frequently ate it for breakfast. For now I must give my Stud Muffin the credit for finding our latest food gadget, the Weber Kettlepizza Kit. I thought what a clever idea to be able to turn your Weber grill into a wood burning pizza oven. So next thing you know Mama is on a mission and our trials and mistakes will you help you get off to a great start if you want to try it as well. I will confess that it is a good bit of work, so this is only for the serious pizza lovers who want to make it at home.

I found out that fast, easy and great tasting dough can be made from Fleischmann's Pizza Crust Yeast. I tried the store locator online but none of the grocery stores that said they sold it in their store actually did. I finally found it in my local super Wal-Mart in Frederick. We tried many different dough recipes and this one won hands down. Another one that was great was a pizza dough recipe that I made in my bread machine set on manual, but you do need to proof the dough for several hours or overnight.
It came as a 3 pack and cost $1.34. I get two pizza crusts from one package since we like a thin crust pizza, you will only get one pizza crust if you like it regular. Just follow the directions on the back of the pack and they even have videos you can watch online as stated on the back of the packs. If you want a thick crust you will need to play with making 2 packs at a time. I can't help you with that since I never eat a thick crust pizza and I welcome feed back on that.

Also yellow corn meal is very important!!! Hopefully my constant nagging during this blog post will drum that into your head. You will need to generously coat your pizza stone and your pizza peeler with it, this will let the dough slide off without sticking. I also like to spray my crust with a thin layer of olive oil before I put my sauce on. I make my pizza right on top of the pizza peeler so that it has one less transfer, the hardest part.

Your next important selection will be your sauce that you choose for your pizza. I can not emphasize the importance of a good tasting sauce, it truly can make what would be a perfect tasting pizza just barely OK. There is so much to choose from so use your favorite jar of sauce or canned pizza sauce. I must admit to you that my best tasting pizza came from my homemade spaghetti sauce. The sauce is your choice! Make sure you do not put it on too heavily or your cheese will right slip off of your pizza. As you can see in the pic above all you need is a nice thin layer.

 Don't forget to generously cover the peeler with corn meal for ease of sliding onto the pizza stone. Also do not make it too far in advance, make it just before you need to place it onto the pizza stone or you risk it sticking.
You will also need a chimney charcoal starter to get to your coals cooking quickly since you do not want to use charcoal lighter fluid. You will also need wood chunks to place on top once you get the coals going. We bought our chunks at Home Depot but make sure you buy a big bag of the larger chunks. You will be surprised how fast the big chunks burn off, those small pieces would disintegrate.

You can see our pizza cooking in the oven. IMPORTANT TIP ~~~ Make sure that your stone height is correct by putting the grill grate inside the Keetlepizza ring on the bottom 3 handle bolts. This will keep your stone level with the opening. Also your stone will get all discolored as it seasons, not to worry. Make sure you have cornmeal on the stone so the pizza slides easily. Your pizza will need to be turned after just a few minutes because it is much hotter in the back then it is in the front. Also I recommend not putting on any toppings until you have mastered your pizza peeler skills. Even so no more than 3 toppings per pizza, it is harder to navigate if you use a thin crust pizza vs a regular crust. Also if the pizza developes a bubble in the crust I like to pop it right away with a long bar b q meat fork.
 If you choose to try the Kettlepizza kit you will be rewarded with a great tasting pizza at home. I used Sargento grated reduced fat 4 cheese Italian blend. So my pizza was lower in fat and to help boost the flavor I sprinkled a little bit of grated Asiago cheese on top and some garlic powder before cooking. My pizza cooked in only 5 minutes and look at that golden brown crust. Yum yum!!!

I watched several videos on youtube and found them helpful to get me started with my new adventure. Please do your homework and you too will feel much better prepared. Also make sure you read the suggestion sheet ( directions), that comes with the Kettlepizza kit. Oh and don't forget the corn meal. 

  • 1 pack of Fleishmann's pizza crust yeast
  • 2 cups all purpose flour, & a bit more for dusting
  • 1/1/2 tsp sugar
  • 3/4 tsp salt
  • 2/3 cup very warm water
  • 3 tablespoons olive oil
  • pizza sauce
  • grated cheese, I used Sargento reduced fat 4 cheese Italian blend
  • garlic powder
  • grated Parmesan cheese
  • grated Asiago, optional
  • corn meal
  • olive oil spray
  • optional toppings
  • Weber Kettlepizza Kit for your Weber grill with accessories 
  • Wood chunks meant for cooking on grills
  • Kingsford charcoal
  • Charcoal Chimney
  • High temp cooking mitts

The amount of the dough ingredients is enough for 2 thin crust pizzas or 1 regular crust pizza. I love to eat a sprinkling of Parmesan on top of my pizza.

Sunday, September 13, 2015

Fresh Lima Bean Soup

I just love the sweet buttery flavor of Lima Beans. Did you know that they are rich in antioxidants, vitamins, minerals, protein, fiber and are cholesterol - lowering from the plant sterols. Whew! That makes the Lima a win win in my eyes. I can't bring myself to eat something healthy unless it tastes good as well. You can hit the jackpot on the Lima Bean when it comes to taste and nutrition value. My Stud Muffin shucked the 4 1/2 cups of these buttery treasures for me. I lured him on with the promise of fresh Lima Bean soup. Enjoy this nice hearty buttery flavored soup where once again I worked my magic on cutting back on fat, but not on flavor. Trick your fat cells into singing. Enjoy!


  • 4 1/2 cups of freshly shucked Lima Beans*
  • 1/4 cup chicken base
  • 4 cups water
  • 1 medium sweet onion, diced
  • 1/2 cup celery, diced
  • 1 cup yellow meat potatoes, peeled and chopped
  • 1/4 tsp. freshly ground black pepper
  • 2 Tbsp. Smart Balance original margarine
  • 1/8 to 1/4 cup cornstarch
  • 1/2 cup Half & Half
In a large 8 qt soup pot over medium heat add first 8 ingredients. Stir well and bring to a low boil, then set to low heat and cover with lid on and simmer for 1 1/2 hours.

Whisk together Half & Half and cornstarch until there are no longer any lumps left. Now while stirring the soup slowly pour in the Half & Half mixture, constantly stirring. mixture will thicken up immediately. Turn off heat and serve immediately.

*I understand access to fresh Lima Beans is limited and seasonal so use some frozen ones if you do not have access to the fresh ones.

Thursday, September 3, 2015

Mushroom - Miso Pasta

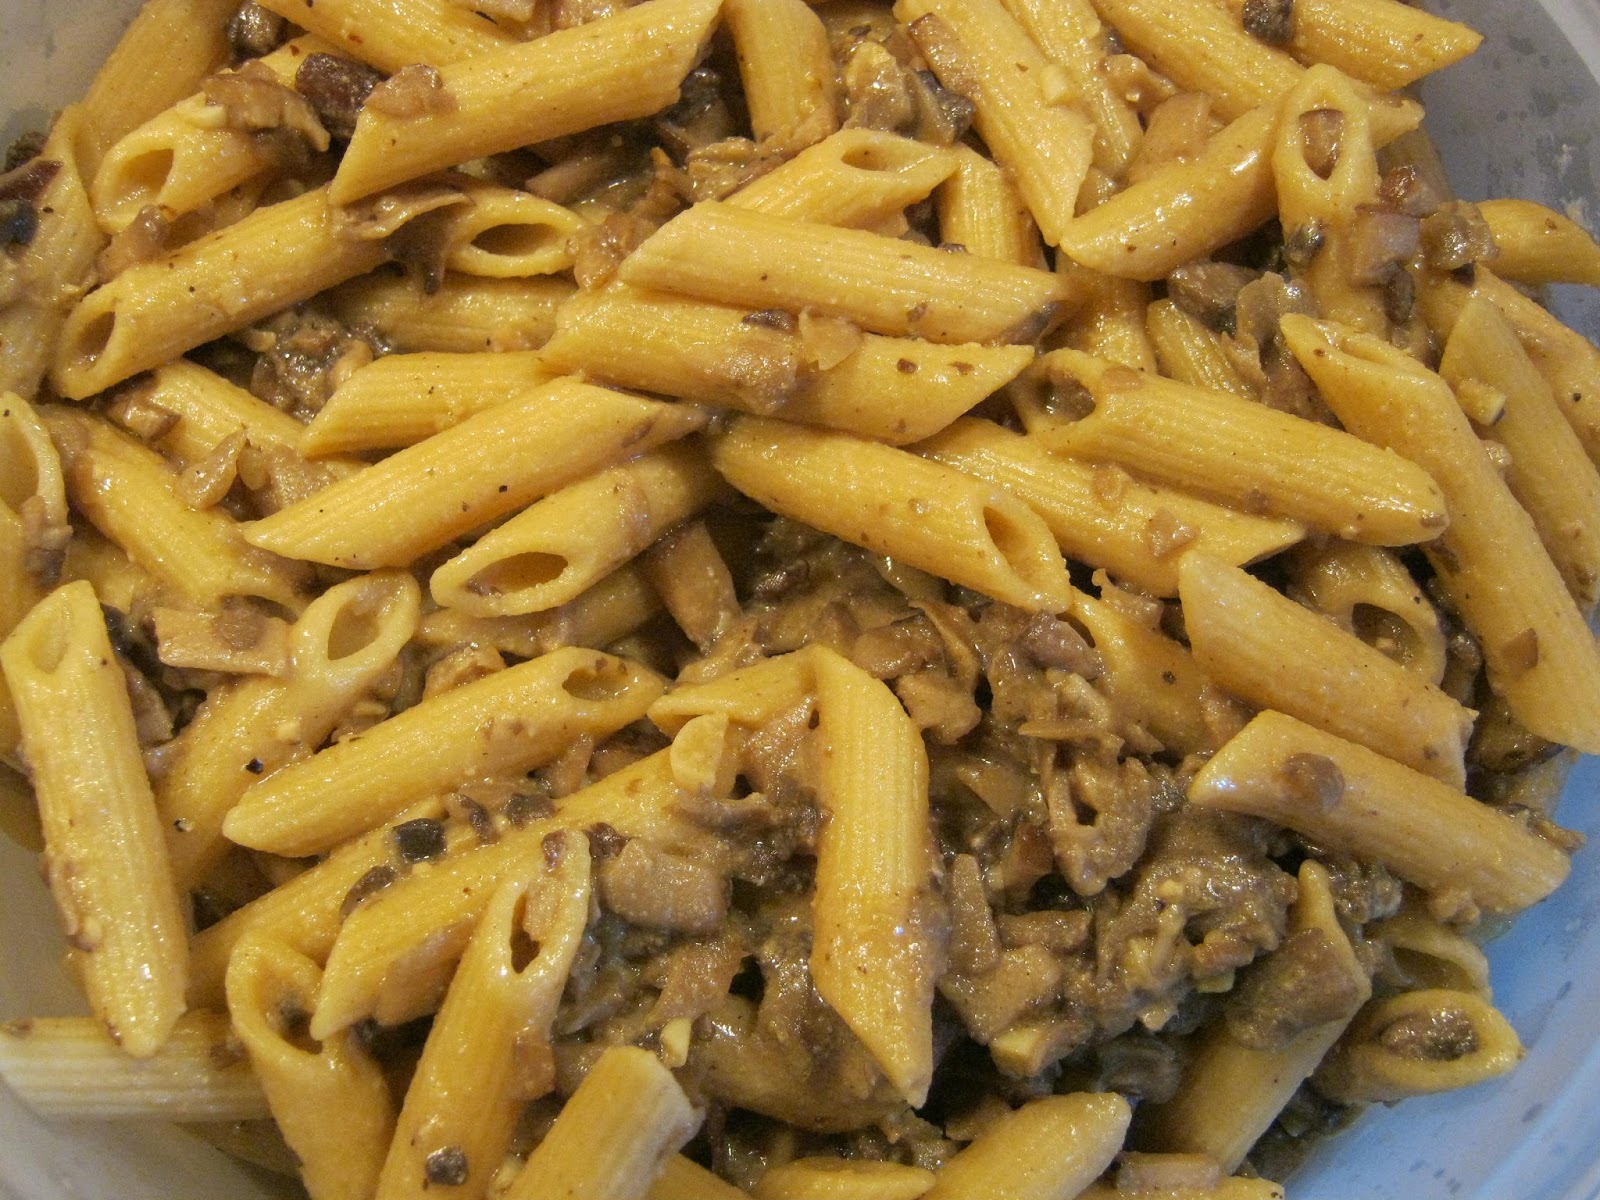
I found this treasure published in my local paper The Frederick News Post. It caught my eye because it uses two of my favorite food groups, mushrooms and pasta. All I can say is that it is doubly special because it is scrumptious and healthy too. I just love that! Needless to say my Stud Muffin is my hardest critic and he loved it as well. The creaminess of this dish is wonderful without any adding fat and calories. Not to mention my love affair that I have with mushrooms. I must say my all time favorites are, number one maitake and second place is cremini. So enjoy this rich creamy tasting pasta dish without the guilt of a high fat dish, sin no more.

  • 1 12oz. box of Ronzoni Smart Taste Penne Rigate
  • 5 Tbsp of salted butter
  • 12 oz (or more if you are a mushrooms addict), of maitake and cremini mushrooms, chopped
  • 4 cloves of garlic, minced
  • 1/3 cup dry white wine, the drinkable kind
  • 1 1/2 Tbsp. white miso paste
  • 9 oz. of chicken broth
  • 4 Tbsp. of nutritional yeast
  • 1 1/2 Tbsp. of Dijon mustard, optional
  • Kosher salt & freshly ground black pepper to taste
Cook pasta according to package directions. Meanwhile in a large skillet over medium heat, melt the butter, allowing it to bubble and cook until it turns a nutty brown, about 5 minutes. Watch it carefully because butter burns easily! Add the mushrooms and garlic and cook until the mushrooms are tender, about 5-7 minutes. Add the wine, stir and scrape to deglaze the skillet, simmer for about 1 minute to cook off the alcohol.

Whisk in the miso into the chicken broth and cook for 2 -3 minutes in the skillet, then add the nutritional yeast (this adds a cheesy like flavor), and stir until the sauce is uniform. Season to taste with salt and pepper. Remove the skillet from the heat and toss into the cooked pasta.

Food Network star Melissa d'Arabian is an expert on healthy eating on a budget. She is the author of a cookbook, "Supermarket Healthy." This is my version of her scrumptious recipe.


Thursday, August 13, 2015

Skunk Odor Removal

On the right is our two knuckleheads, Riley the Corgi and Teddy the Labrador. I named this pic " The Dueling Wee Wee boys". We love our boys very much, but they have a serious problem with skunk hunting. They seem to relish in chasing them and always ending with the same results, GETTING SPRAYED. I even talked to my Veterinarian about our dilemma. He said---Some dogs will only get sprayed once, while others keep going back for more. Well our two nuts keep going back for more. Luckily for them we have over 4 acres for them to roam on and we have an invisible fence to keep them on our property. We love our backyard and all of the wildlife we see, but the Invisible Fence does not keep out other animals. The main problem is Mr.Skunk sauntering onto our property, and the skunk spray is NASTY!

  • 1 Quart 3% Hydrogen Peroxide
  • 1/4 cup baking soda
  • 1 tsp. Dawn dish detergent
  • latex gloves
  • bucket
  • sponge
 I recommend two people to help with this process. Make sure you soak the collar in the mixture as well because chances are the collar was sprayed too. Also we hook the hose up to our basement laundry tub sink and run the hose out the basement door. We are able to do so because our faucet has threads on it to attach a hose at the end of the faucet. This is not by chance, after many dogs getting sprayed through the years we installed our beloved life saving faucet. The Stinker Saver!

I also had a Feasty Fan tell me that it removes pet odor from carpet as well. Thank you for the tip Jenny.

1. Rinse dog down completely with warm water. I highly recommend that you do this outside if at all possible. We put on another collar and attach it to our gas grill by a leash. No running away and your hands are free to clean them up.

2. Meanwhile as the dog is being thoroughly wet down with warm water have your partner mix together the skunk mixture, stir well and drop in collar and sponge.

3. Remove collar from bucket once saturated and set aside. We have nylon collars that clean up well, no leather here.

4. Now sponge the mixture over the dog spreading in well with the sponge, being careful not to get any mixture into their eyes, nose, mouth or inside the ears. When working near these areas make sure the sponge is squeezed out well so nothing runs where it should not run, but enough to clean off stink. You will need to spend careful attention to the face, head and neck area because skunks have impeccable aim and shoot for the face.

5. Now wait for 10 minutes as the mixture does it's magic. Trust me it will be the longest 10 minutes of your life.

6. Rinse mixture off well with warm water and let your furry buddy shake off what they can. Now dry your baby off and bring him/her inside.

Dawn dish detergent is a must because of it's grease cutting ability aka the oily skunk urine. Check your dogs eyes and make sure they did not get a direct hit. If so I recommend a visit to the Vet as the skunk spray burns their eyes and is a horrible irritant. I buy my Hydrogen Peroxide at the wholesale food clubs. Also I always have my skunk station set up and ready to go during skunk season.

Above you can see Teddy sleeping peacefully on his favorite blanket on our leather couch minutes after his deskunking. What a life, let the abuse continue.

I found this recipe on the internet from B.O.S.S..Boxers, JLH Web Productions and it is by far the best recipe for skunk odor removal. We have used this recipe many time with great results. Thank you BOSS Boxers!

Monday, August 10, 2015

Grilled White Peaches

Summer is one of my favorite seasons for many reasons and fresh peaches is at the top of my list. Not to mention sweet corn, home grown tomatoes, oh I could go on and on. I must admit that I am hooked on fresh sweet white peaches. Pure ambrosia!

It all started years ago when my Dad brought me some white peaches for the first time. I ate 3 of them that day and immediately was addicted. So every year I look forward to satisfying  my craving once a year. This year I decided to try grilling these sweet treasures. I  felt it in my bones that it had to be a win because I know how delicious grilled pineapple is.

  • 2 ripe white peaches
  • 1 Tbsp. melted unsalted butter
  • Turkey Hill Vanilla Bean fat free ice cream, no sugar added
  • 1/4 cup Kashi Go Lean crisp multi grain cluster cereal, slightly crushed
 Preheat grill on high for about 5-8 minutes. Meanwhile wash and dry peaches and slice in half and gently remove pit then brush melted onto both side of peaches. Crumble cereal and set aside. After grill has been preheated place peaches on grill for about 3-4 minutes per side, only turning once gently using tongs. I use a gas grill and every grill is different so your cook time may vary. Serve naked on a plate or top with one scoop of ice cream and crushed cereal.

I did not want to add much fat, calories  or sugar to my version, but feel free to Haagan Daaz it up if you want too. Be daring and choose any crunchy topping of your choice, maybe granola. I also thought about dipping the flat meaty side of the peach into brown sugar, maple syrup or honey to help carmelize it. For me the peach has a nice sweet delicate flavor and I would not want to cover it up. Sometimes simple is better, serves four. Enjoy!